

You will now have a complete ad set if you’ve followed steps one to four in this series. There’s one final stage left: creating a new ad set on LIGR Live, uploading your ads, and configuring your ad set to display during your broadcasts.
If you’ve followed my recommendations, you will have installed Canva on your computer and created the ad set outside of LIGR Live to benefit from Canva features that aren’t available if you use the browser-based version of Canva that’s built-in to LIGR.
One of the nice things about Canva is, all of your files are stored in the cloud, so it doesn’t matter which version of Canva you log in to or what device you use – your files will always be there.
You might be the person designing and uploading the ads, or you might just be designing the ads and then passing them on to a LIGR user to upload – we’ll cover both scenarios in this post.
When you design ads in Canva, the file you create is an editable Canva file. You can’t download this file from Canva, but you can share it with other Canva users or download an image or video file that’s based on the Canva file. The JPEG, GIF, or MP4 you download will be non-editable. This is the file that is displayed during your matches with LIGR Live.
There are two ways to get the ad image files into LIGR Live:
The first method is the easiest, but you might need to use option two if you are designing the ads and then passing them on to a LIGR user to upload.
After you’ve created your ad set in Canva, you can use the Canva button in LIGR Live to upload your ad set to LIGR. This means you don’t have to worry about exporting your files from Canva.
If you’ve been using the desktop version of Canva, this step is necessary so that you can access your Canva account from your LIGR Live account. First, visit canva.com and log in to your Canva account. Then open a new browser window and log on to your LIGR Live account. Go to the Ads section and hit the red “Create ad set” button at the top right of the screen.
Give your ad set a name, select the brand or create a new brand if necessary, and then select an “Ad Category.” My ad set is an internal promotion for LIGR, but if yours is a paid sponsorship, you will have a few additional options to fill out in this form.
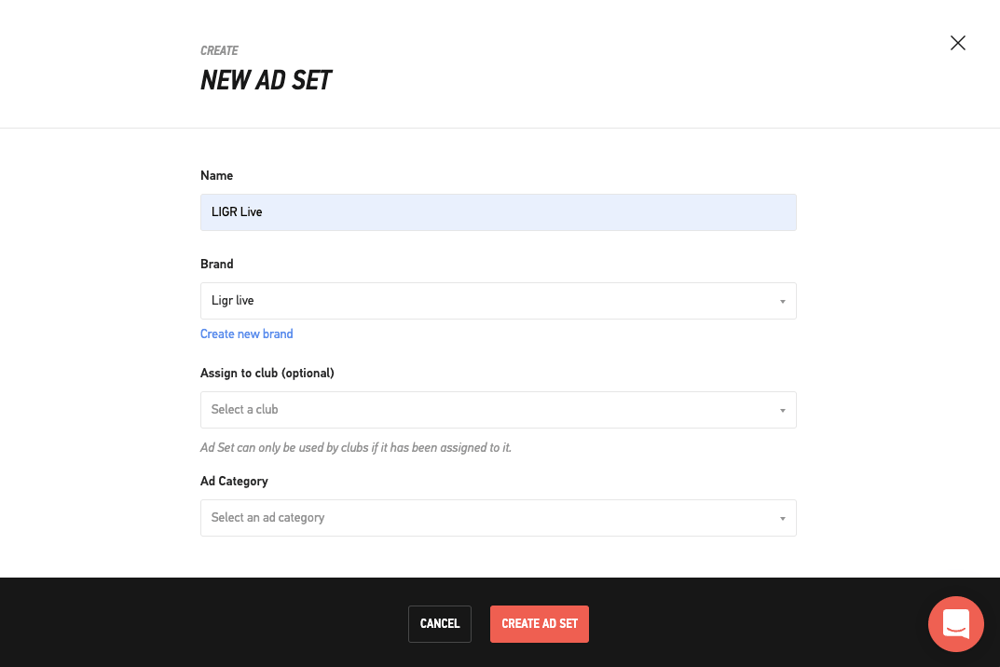
Creating a new ad set in LIGR Live
Hit the red “Create ad set” button, and you’ll then see the ad set management screen.
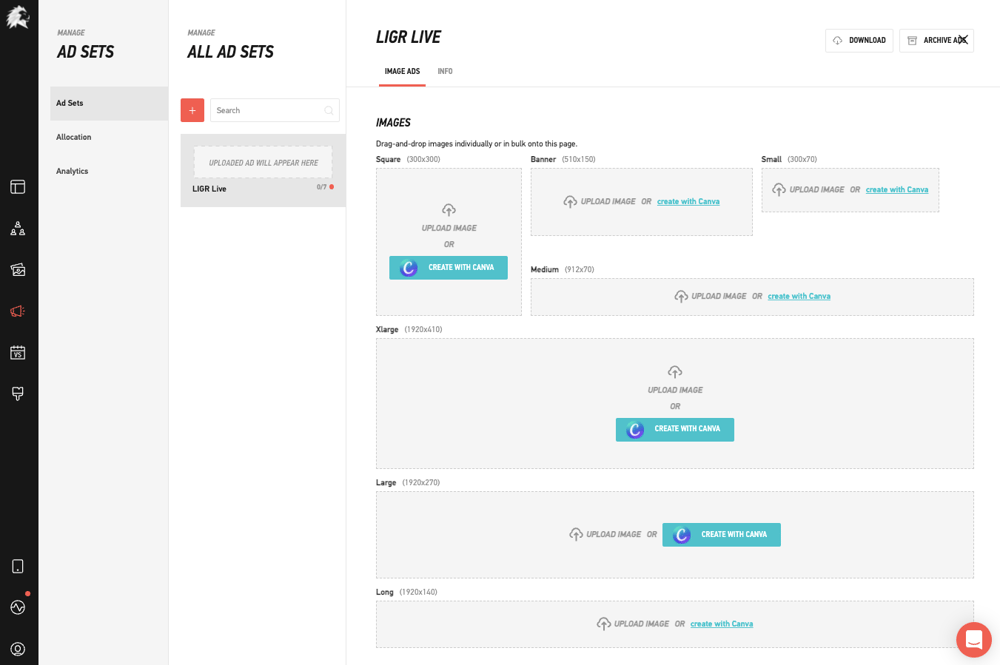
Configuring an ad set in LIGR Live
Press the blue “Create with Canva” button for the square ad, and Canva will open in a pop-up window within LIGR Live.
I have already put my LIGR ads in a folder within Canva called “LIGR banners” (see how to do this here) so I can see my folder on the left menu (the small preview image of the square ad). If you don’t see your folder here, you can access your files using the “More” section on the menu.
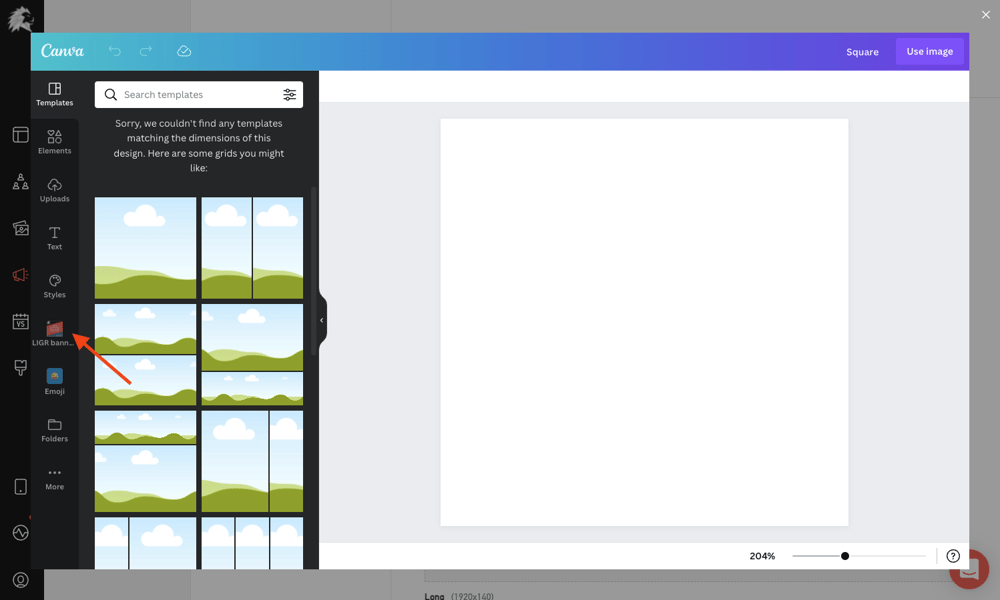
Using the Canva button to upload ads in LIGR Live
Sometimes it can be difficult to tell the ad sizes apart within Canva, so click on the three dots to see the filename and check you have the correct file. Once you’ve found your files, select the square ad to open it (click it).
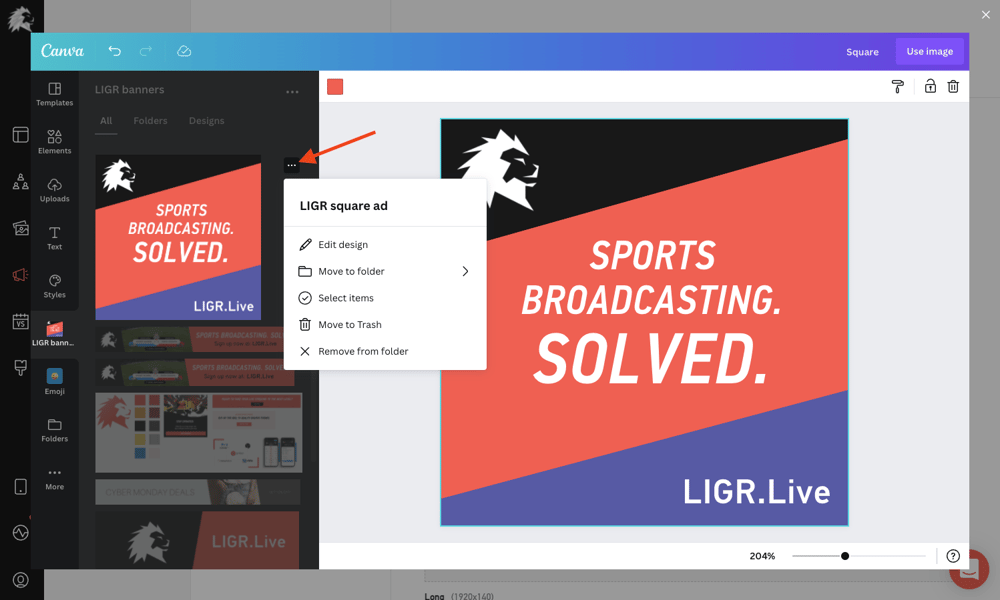
Using the three dots to view Canva filenames
Always confirm files by name rather than by eye, looking at the thumbnail preview. Also, note that the preview image isn’t always accurate in Canva, especially if you duplicated another file as part of the resize process. This is also why it’s essential to include the correct name of each banner size in the filename when you are resizing your ads. It’s very easy to make a mistake, misname a file, then upload the wrong file.
Once you’re happy you’ve got the correct file, press the “Use image” button at the top right to upload the image file to your LIGR account. When you press this button, it takes a few seconds for Canva to export the image file and save it to your LIGR Live account in the correct format.
The Canva pop-up will close, and you’ll see the square ad preview image saved to the ad set in LIGR Live. Again, double-check that the image looks correct and isn’t stretched or pixelated. (If it is, it’s likely you’ve accidentally selected the wrong file.)
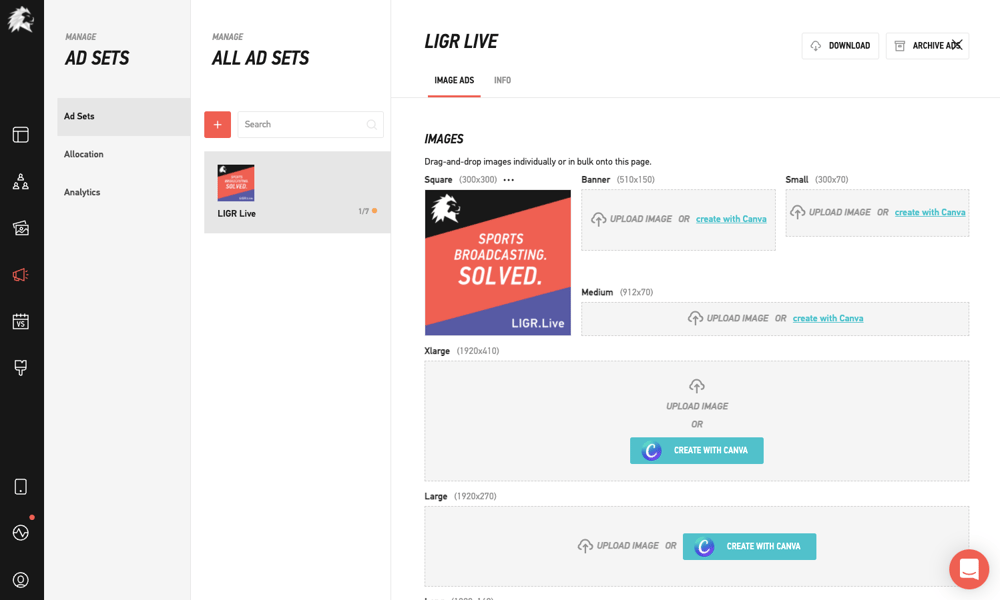
The square ad uploaded to LIGR Live
Repeat the process for the remaining six ads.
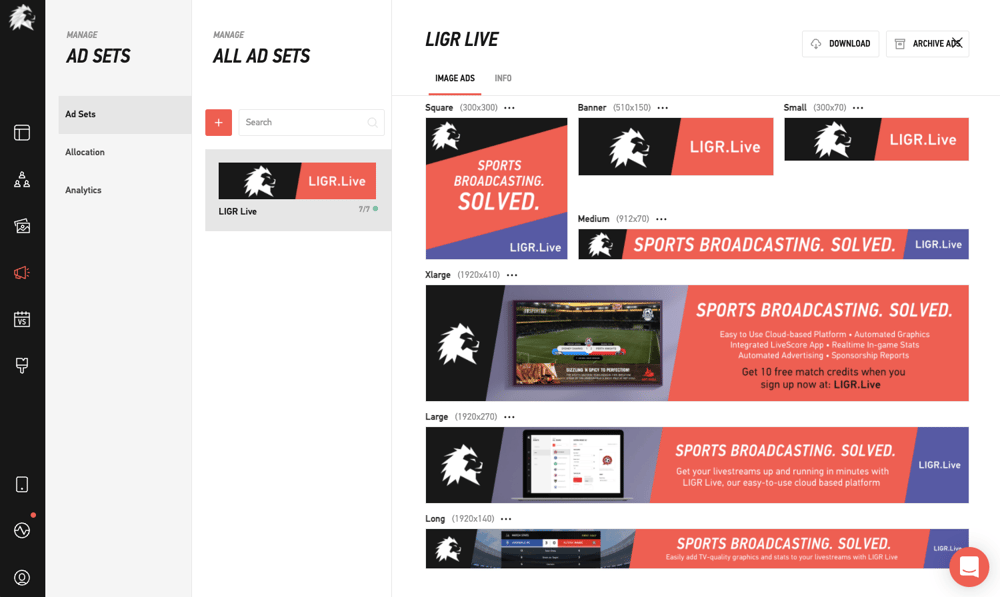
The full ad set uploaded to LIGR Live
Sometimes Canva can be a bit buggy, and when you click on your ad, it doesn’t open, especially with the smaller ad sizes. There are two ways to get around this. Click the three dots and select “Edit.” The file will open in a new browser window. Select all the elements and copy and paste them into the Canva pop-up window in LIGR Live. Or you can follow option two below: open the Canva app on your desktop, export a PNG, and then upload that file to LIGR Live.
Image files for your ads are exported from Canva using the download function. Open your files one by one and choose “download” under the “File” menu.
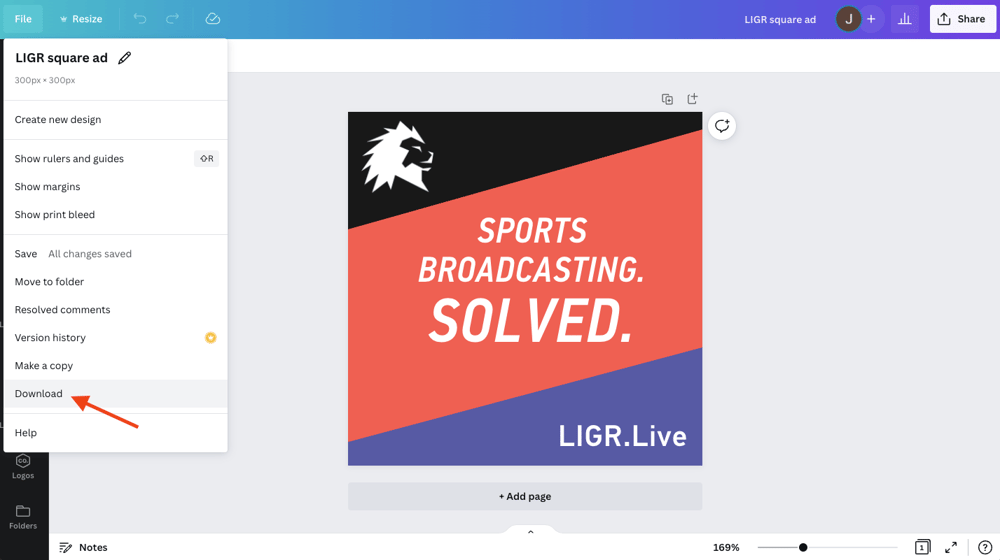
The download feature is under the File menu in the Canva desktop app
You’ll then see the download settings:
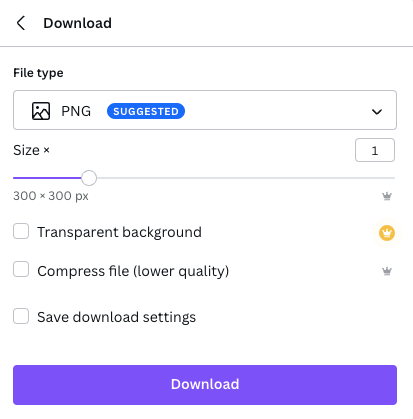
The download settings menu in Canva
Accept the default settings: PNG file, size 1, and leave the boxes for transparency and compression unchecked.
A PNG is the best file type for ads on LIGR as it can be exported from Canva uncompressed. You don’t want to compress your files, as this will cause the colors and images to change and reduce the image quality. When the ads are added to your livestream video feed, the feed will also be compressed, and you don’t want to perform double compression as this will make the ads look degraded.
Below are two image files exported from Canva. The GIF is compressed, while the PNG file below is uncompressed. If you choose to download a GIF from Canva, you don’t get the option to select uncompressed or change the compression settings.
A compressed GIF file exported from Canva

An uncompressed PNG file exported from Canva
There are subtle but noticeable differences. You can see that the text is slightly foggy in the GIF, and the diagonal lines are not as crisp as in the PNG. If I uploaded the compressed GIF to LIGR and used it in a livestream, the text would become even more blurred, and the diagonal lines more jagged when the image is compressed for a second time.
Typically ads created to be displayed on the web would be saved as GIFs or JPEGs so that they can be compressed to the smallest possible file size, as many platforms have file size limits for ads. LIGR has no limit, so files should be exported without compression.
Export each of the seven ad set files as a PNG and save them into a new folder on your computer’s desktop to make sure you don’t mix up the files with any other files.
To upload your images, follow the same process for creating a new ad set under option one above, but instead of pressing the Canva button, select “upload image.”
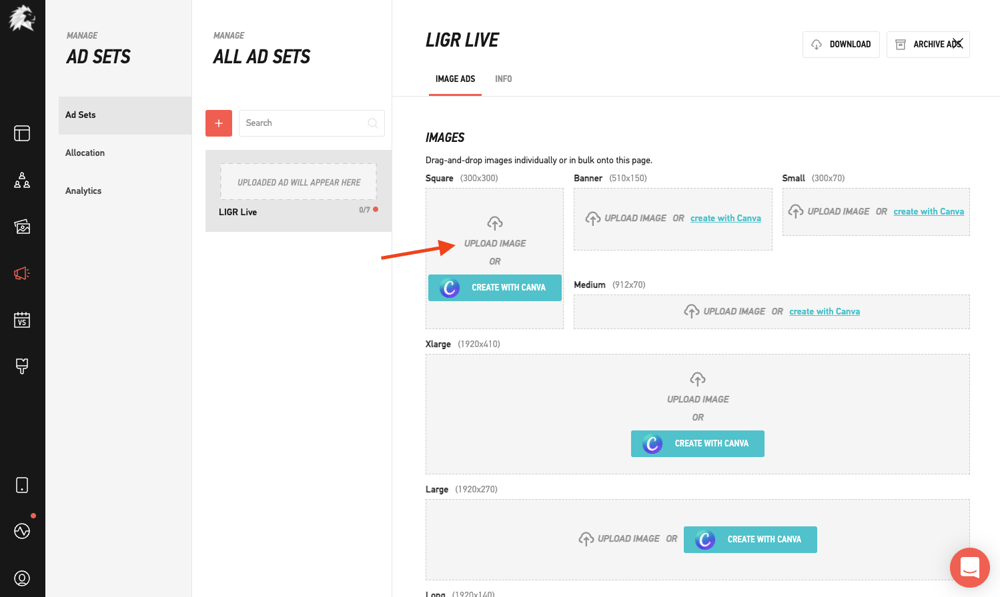
Using the upload image feature in LIGR Live
Then, navigate to your desktop and select the correct file. Repeat the process and upload all seven ads.
Once that’s done, your ads are ready to be displayed during your livestreams.
At this point, you might think that the text and images look small but remember that the ads aren’t displayed at 100% size if you’re viewing your LIGR account on a small screen or your browser window isn’t full screen. You can preview how your ads will look during a broadcast using LIGR’s built-in preview feature.
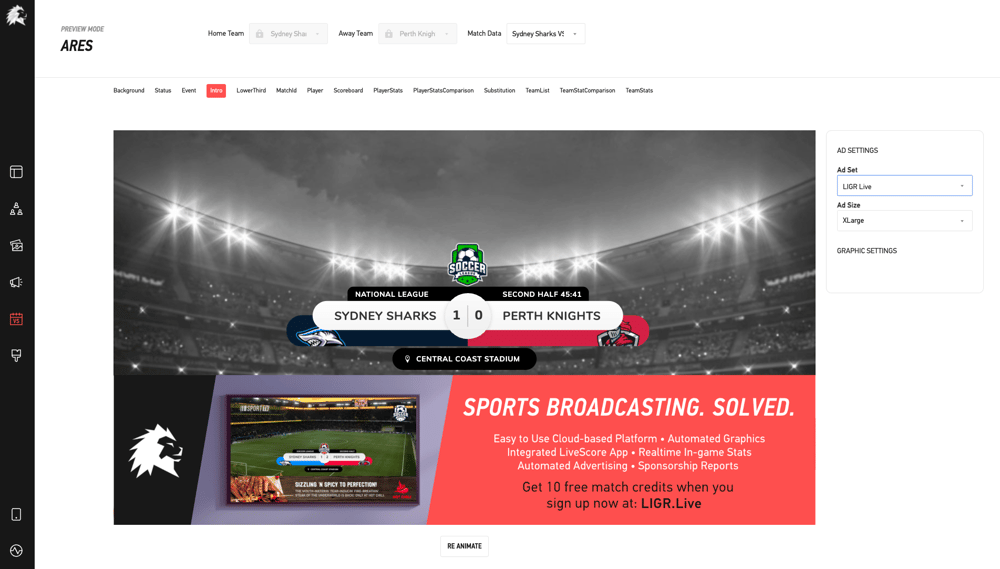
The preview area in LIGR Live
After your ad set is set up, you’ll need to configure ad allocation to display the ads during your broadcasts. If you don’t know how to do that yet, you can learn how by visiting the LIGR Help Center.
You now know how to create an ad set, but even after your ads are live, the design work isn’t completely finished. If you want to make sure your sponsors’ ads continue to perform, you need to learn how to refresh your ads.
👉 Read Step 6: Refresh Your Ads to Keep Fans and Sponsors Happy
👉 If you haven't already, read the introduction to this series: The Ultimate Guide to Creating Ads for Sports Broadcasts with Canva


